Rundown Stories
Add a Story
You have a number of options for adding stories to a Rundown:
-
Create a new row in the Rundown by selecting Insert Row
 or by pressing Ctrl i.
- Drag a wire story into the Rundown. See Wire Viewer for more information.
- Drag a Story from a group folder, such as the Home Folder or a group folder you have opened through the Enterprise Browser, into the Rundown. When you drag a Story from a group folder into a Rundown in another group folder, the Story will be copied from its original location. If you drag a Story from a group folder into a Rundown in the same group folder, the Story will be moved from its original location. To reverse the default copy/move behavior, hold down the Shift key while you are dragging the Story.
- Drag a Story from your Personal Folder into the Rundown. When you drag a Story from your Personal Folder into a Rundown the Story will be copied from its original location. To move the Story instead of copying it, hold down the Shift key while you are dragging it from your Personal Folder.
- Drag a Planning Item fromPlanning Grids into the Rundown.
- Drag an item from the Planning Calendar into a Rundown.
Edit a Story
To edit a Story double-click its slug.
Move a Story
To move a Rundown item, drag its Story slug to a new position. This will also work for items that contain multiple segments. Individual segments may also be dragged to new positions by clicking on the "segment" portion of the Rundown. See Create Segments for more information.
To move multiple stories within a Rundown at the same time, mark them by holding the Ctrl key and clicking on each slug you want to select or press Ctrl B. Selected Stories will be marked with a dark gray background. Use the arrow keys to navigate to the part of the Rundown you want to move the Stories to and press Ctrl A to move them.
To move multiple Stories first highlight them, then drag and drop them at the point above which you wish to move them. Items are repositioned in the order that they were selected, so it is important that you mark them in the desired order before dragging them to a new position.
Items can be copied from one Rundown to another using the drag and drop techniques described above. Approval indicators are removed when items are copied into new Rundowns. Items may be moved between Rundowns by holding down the Shift key while dragging and dropping items. The original will be deleted.
If you want to move an item during a show it is recommended that you first Float a Story to remove them from the MOS playlists. After they are moved you can remove the checkmark from the Float column to reinsert them in the playlist.
Create Segments
The ENPS Client lets you group individual segments of a Story into one block.

To create the block, first create a new row and give it a slug. Then insert another row and give the new row an identical slug to the row to which you want to add a segment followed by a hyphen and the name of the segment, e.g. "Mayor's Race - Interview with Mayor Stevens." This will create a visual grouping for the multiple elements for a Story. Alternatively, you can select the slug and use the shortcut Ctrl Shift i to add a new segment to the grouping.
You may change the slug or segment name for the Story by typing over the existing slug/segment or by clicking in the slug (or segment) window and hitting the Backspace key.
Double-click the slug to open the Story. If the Story is already open, double-click the new row's slug to edit it.
Black Line a Story
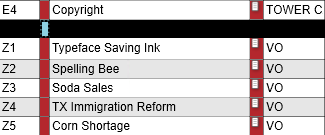
The black bar across the Rundown is used to separate content that will be included as part of the broadcast or digital output. Stories below the black line are not included in the timing, prompting, or MOS functionality. This area of the black line is useful if the producer is not sure whether a segment of the broadcast will run over or under, and another Story can be added or removed quickly to make up for the difference.

Stories below the black line can be moved above the black line at any time.
Stories below the black line do not archive when Auto Archive is selected in the Rundown properties. Users can save the stories below the black line by manually archiving the Rundown.
Float a Story
An alternative to Black Line a Story is to use the Float feature. This will keep the story in its allocated row, but it will not be included with the regular timing, prompting, and MOS functionality.

To use this feature, first add the Float column by clicking the Select Columns button on the Rundown Ribbon and adding it to the Selected Fields pane.
![]()
Once that column has been added to the Rundown you can click the checkbox in a Story row to float it. The color of the row will change to red. To re-activate the Story, click on the check mark in the float column.
However, be aware that unfloating a Story too close to the time it is scheduled to go to air may mean peripheral devices will not be able to load the Story for air as quickly as you will need them.
Delete a Story
To delete a Story from a Rundown, either drag it to the Waste Bin or highlight it and press Ctrl Shift D.
Story Color Codes
In each row, the color indicators adjacent to the Story slug serve as indicators for whether the Story contains content—including text and/or media—and whether it has been approved.
![]() A yellow marker indicates that an item does not have any content.
A yellow marker indicates that an item does not have any content.
![]() A red marker indicates that an item contains content, but it has not been approved.
A red marker indicates that an item contains content, but it has not been approved.
![]() A green marker indicates that an item contains content and has been approved.
A green marker indicates that an item contains content and has been approved.
Only users with sufficient privileges will have the ability to approve items.
Story Locks
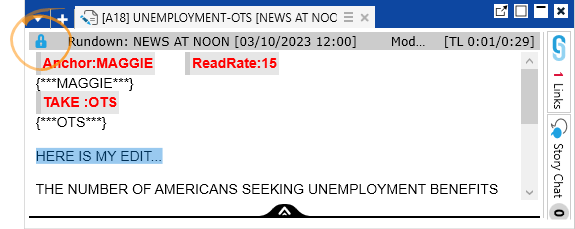
A story that is open for editing by one user is considered locked for editing. It cannot be edited by anyone else until the user saves their changes and closes the story.
A lock icon at the top of the story indicates it is locked for editing.

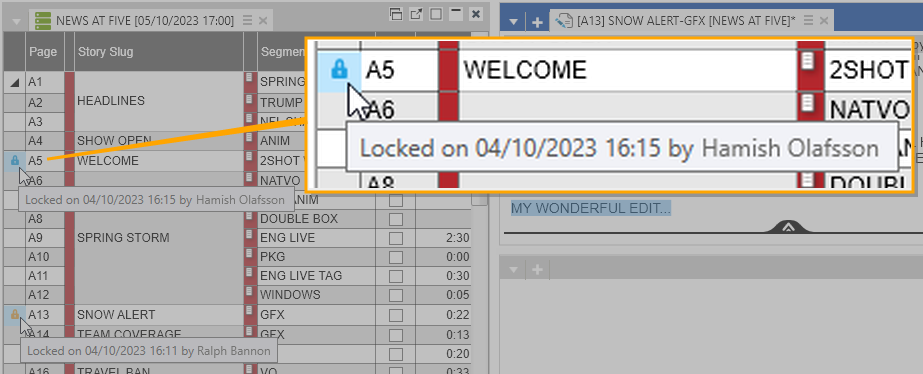
The lock status of a story is also shown on rundowns.

![]() - edit-locked by the logged-in user
- edit-locked by the logged-in user
![]() - edit-locked by a different user
- edit-locked by a different user