Group Maintenance
Staff Privileges
To access the Staff Privileges screen, right-click on the Home Folder on the NavBar and select Group Maintenance > Staff Privileges.
Users with sufficient security can use this screen to set the security privileges for other users or set up new user accounts.
Users can sort the table on the right side of the pane by clicking on the User or Role column-headers.
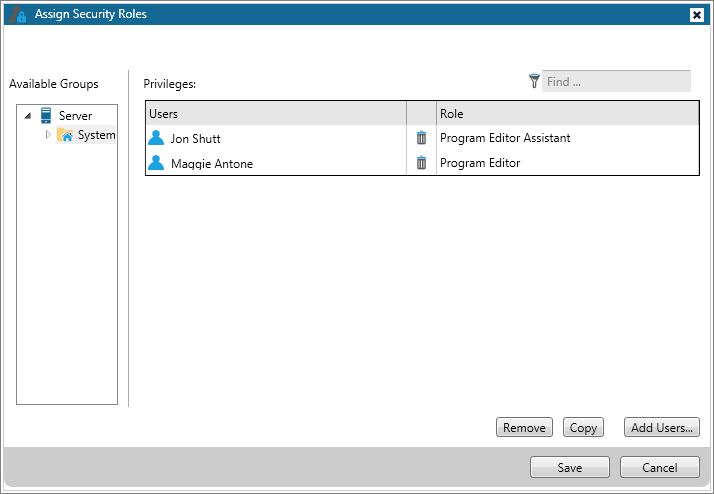
You can use this screen to set users' security privileges or to add new user accounts to a group.
To add a user to a group:
-
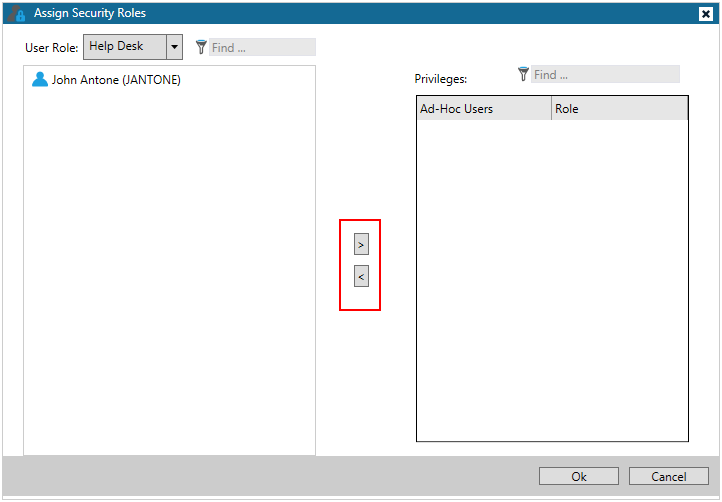
Click the Add Users... button in the bottom-right corner of the Assign Security Roles window.
-
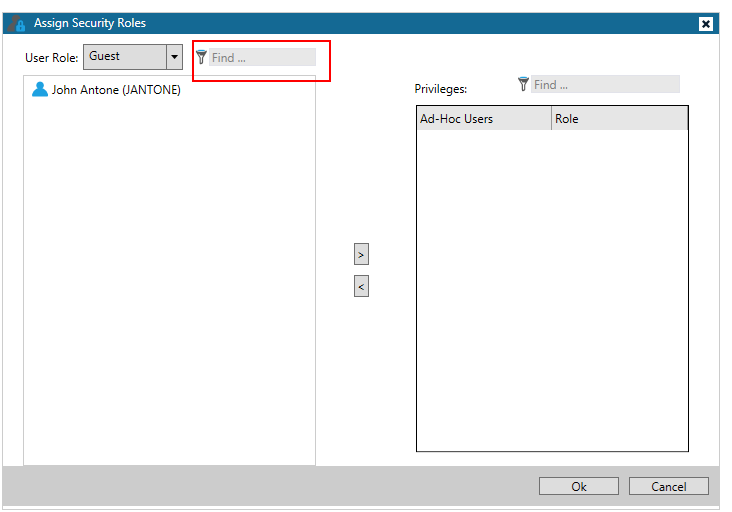
A window will appear with a list of users to select from. You can filter the list of users by entering a keyword into the Find... field.
-
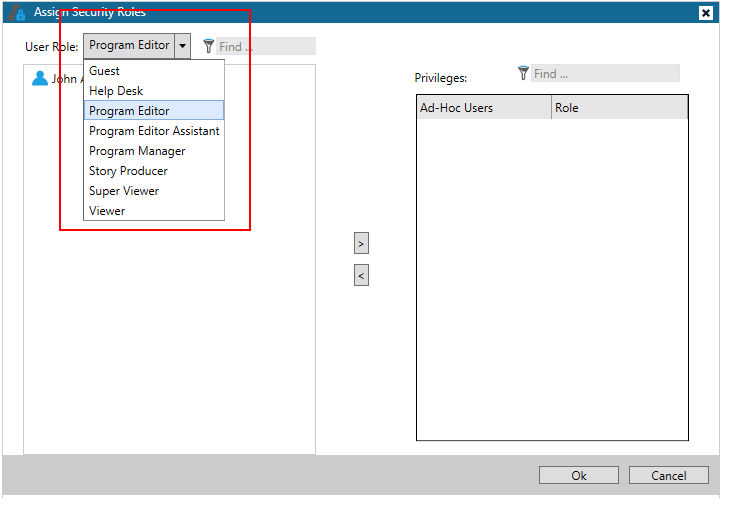
Once you have found the user you wish to add, select that user's name and use the User Role drop-down menu to select a role to assign to that user.
-
Once you have selected the user(s) and their role(s), use the right arrow button to add them. If you wish to remove a user, select their name and click on the left arrow button.
-
Select the Ok button to apply your changes.
Report Layouts
To access the Report Layouts screen, right-click on the Home Folder on the NavBar and select Group Maintenance > Report Layouts.
Report Layouts allows you to determine how text fields are arranged when you print stories and Rundowns from the ENPS Client. To modify a report layout, select the report layout name and then click Modify. To delete a report layout, select the report layout name then click Delete.
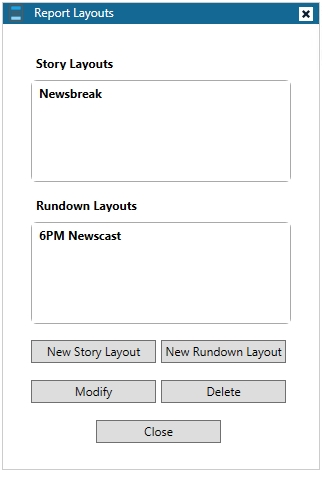
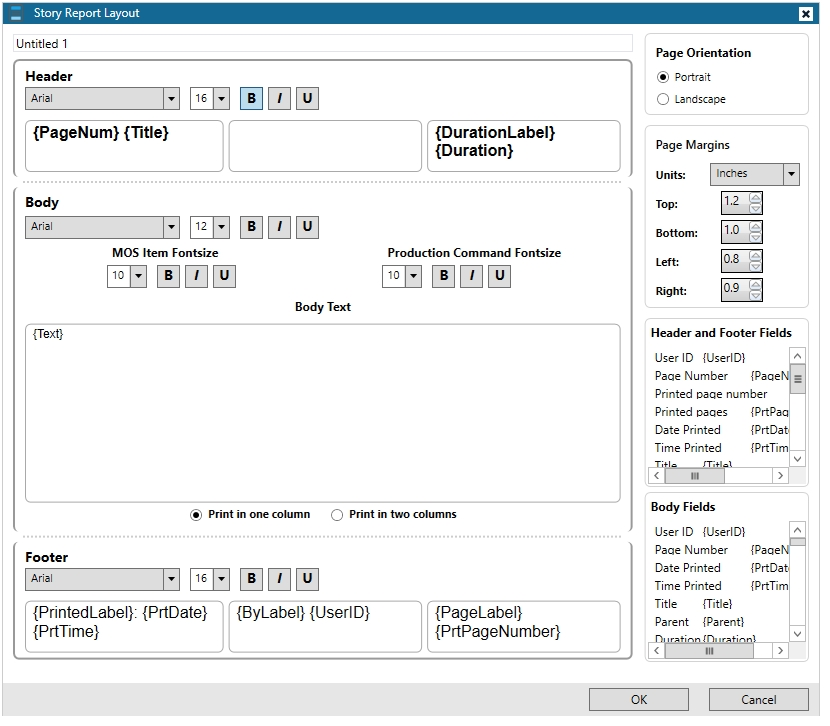
When you create or modify a layout, you will see a screen like the one below. This screen allows you to set the parameters for the header, body, and footer of the printout. The header and footer both have three boxes that correspond to the left-justified, centered, and right-justified areas on the page. You can add fields to one of these fields by dragging in the field name from the respective box on the right. You can also control the page orientation, margins, and font sizes of various elements in the printout.
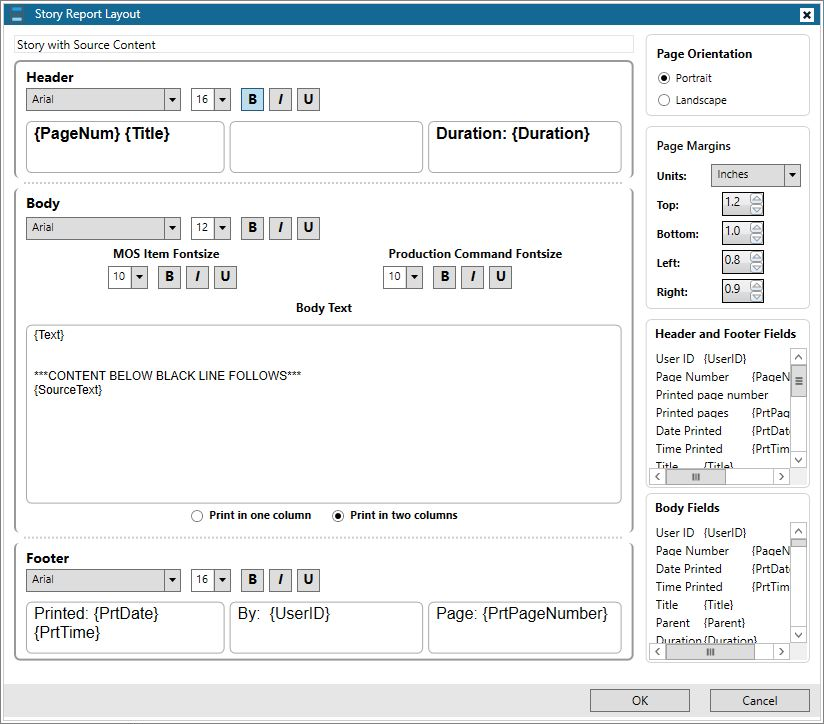
While the Body Text box traditionally includes the {Text} Body Field, you can configure a story report layout to print content from the Source Content Area in addition to story text. To configure this, add text to the Body Text box followed by the {SourceText} Body Field as seen below. Save your new story report layout. It is helpful to title your story report layout with an identifier to be better able to distinguish between report layouts that do and do not print content from the Source Content Area.
Templates
To access the Templates screen, right-click on the Home Folder on the NavBar and select Group Maintenance > Templates.
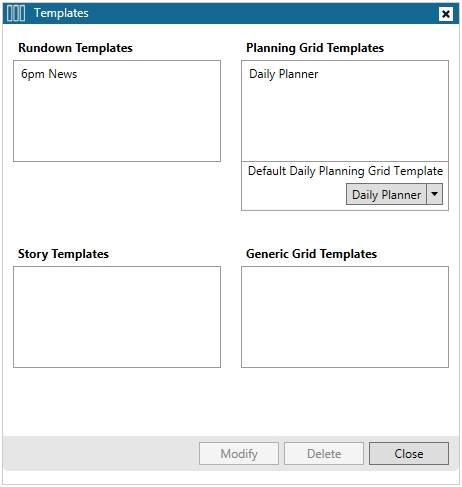
The Templates screen allows you to see a list of your current templates for Rundowns, Planning Grids, and Stories. To modify a template, select the template name and then click Modify. To delete a template, select the template name then click Delete.
If you select a Default Daily Planning Grid Template the next time a user adds a Planning Item to an empty date on the Planning Calendar, ENPS will update the view to match the default template. Any Planning Items in the template will be added to the Planning Calendar.
